
“I’ve been doing Codecademy and other tutorials for some time now. But how do I get my site online?“
This is a question I have been asked multiple times these past few months.
I know how tough “getting a site online” can be for beginners. Especially for those who just finished a basic HTML/CSS course and are dying to get their work online.
That’s why I created a quick step-by-step guide showing how to get your site online using Github Pages.
Disclosure: I’m a proud affiliate for some of the resources mentioned in this article. If you buy a product through my links on this page, I may get a small commission for referring you. Thanks!
Why You Should Use Github Pages
Like anything, there are many ways to get your HTML, CSS, and JavaScript (JS) files online.
However, I think Github Pages is one of the best ways to do so.
- Github is important for any aspiring developer/designer to learn and use
- Developers and programmers of all kinds use Github
- Plus, setting up a site on Github Pages is free
This walk-through was created with complete beginners in mind, including those who have never used Github.
I will show how to take your static website files, already on your computer, and put them online as a website.
Required Tools to Get Your Site on Github Pages
To get started, this is what you’ll need:
- Computer/laptop: I will be using my Macbook Pro
- Text editor: I use Sublime Text 2, but there are other options
- Basic HTML and CSS know-how: the demo files I will be using are very simple
- Github account: which I’ll show you how to make if you don’t already use Github—it’s like creating any other account online
- Command line: AKA CLI, AKA Terminal, AKA Console. Or willingness to use it in a very easy way :)
To go along with this tutorial, I created a video to follow.
The video starts from the absolute beginning. It is perfect to watch if you are especially new to HTML and CSS.
8 Steps To Getting Your Site Live on Github Pages
First, here is the link with more information about Github Pages and setting one up: https://pages.github.com/
Step 1: Sign up for / Login to GitHub Account
Do this at Github.com.
Creating a Github account is like signing up for Facebook or Twitter. You’ll give your name, username, email address, and set a password.
If you already have an account, then log in.
Step 2: Understand The Difference Between User Sites and Project Sites
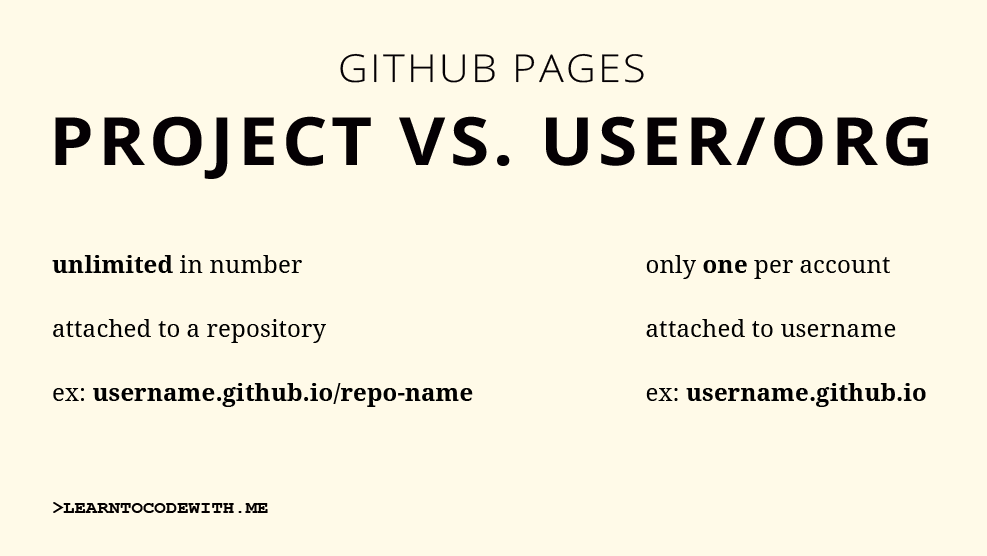
When it comes to making a Github Page, there are two options: a project site or a user/organization site.
The difference is this: you have unlimited project sites, but only one user site. My user site is laurencebradford.github.io. Because laurencebradford is my username.
An example project site would be: laurencebradford.github.io/wp-quiz/
Here, wp-quiz is tied to the wp-quiz repository.
If your head is spinning: don’t worry.
Basically a repository is like a (complex) folder with a bunch of files. Different people can even edit the files within a repository at the same time. And you can create as many repositories as you’d like on Github, each with a corresponding Github page.
On the other hand, you’re only allowed one user site. So if your username is chunkymonkey—your Github user site will be chunkymonkey.github.io.
For this run-through, I will be setting up a user site. Meaning the steps I follow are a bit different than those for a project site.
When deciding which to create, consider your goals. And remember you only have one user site. (But you can always change the contents of the site you setup now, if you follow along, in the future.)
Step 3: Create a New Repository
In your Github dashboard, click “new repository” as shown below.
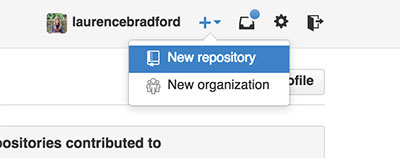
Then, and this is very important, make sure the repository name is your username.github.io. As pictured below.
Of course, make sure to input your username—not mine. So, if your username is chunkymonkey—it’d be chunkymonkey.github.io
Feel free to add a description or not. (Basically, it’s just a description of your repository.) And, unless you want to pay monthly, the repository must be “public“.
I’m not initializing with a README. So if you’re following along—don’t either.
Finally, click the green “create repository” button.
Step 4: New Repository Page Explanation
Immediately after clicking the”create repository” button, you will see a page that looks like this.
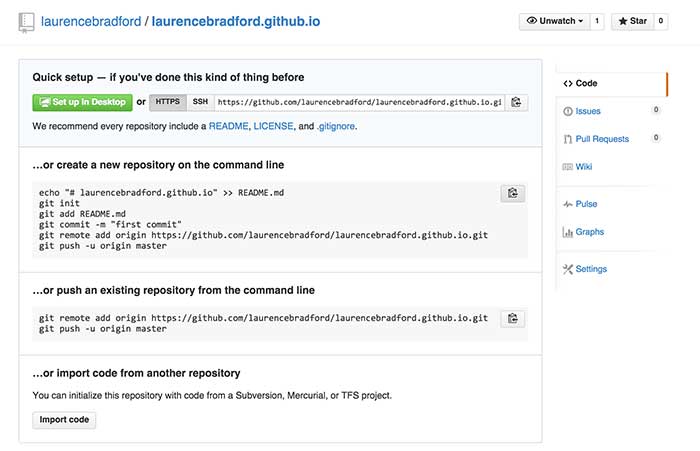
This page is explaining how to get your files (your HTML and CSS) into the repository. (Again, think about it like a folder attached to your Github account.)
You are basically putting the files that are on your local computer into a folder on Github using git.
Now, if you’re brand new, all of this may look scary. But fear not.
The directions above are showing how to get files on your computer onto Github using your terminal. AKA the command line.
Don’t worry about learning the command line right now if you’re just starting out. However, I highly recommend getting comfortable in it. And sooner is better than later.
As you’ll notice in the official direction set, there are a few ways to get your files onto Github. Meaning you don’t have to use the CLI.
But, in my opinion, using the terminal is the fastest and easiest way. Plus, it’s good practice. Because using the terminal is an important part of being a developer.
So that’s what I’ll be doing. And because I am on a Mac, I will be following instructions for the Mac terminal.
Note to Windows users:
The terminal is different from that on a Mac. I am not familiar with the Windows terminal, meaning I am not 100% certain the following steps will work if you are on a Windows machine. But, according to what I've seen online and the official Github documentation, I *think* it should work. At the bottom of this article I have additional resources for Windows users.
Step 5: Have Your Site Folder Easy to Access
Have your folder with your website contents ready to go. (It can be named anything.)
I have mine saved on the desktop of my computer.

The contents of my folder are very simple. Just an index.html file and a main.css.
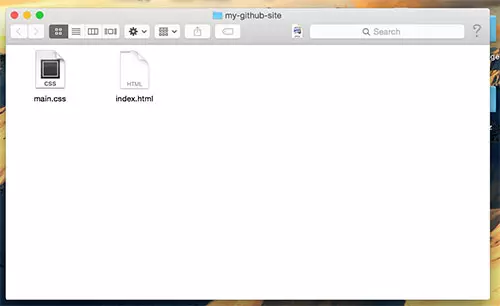
IMPORTANT: In order for your website to work on Github pages, it is very important that your primary HTML file be named index.html. So, if you have it saved as something else, rename it to index.html. If you have other pages—like an about.html—that's fine. As long as the main is named index.html.
Step 6: Open Your Terminal and go to Project Location
Open your terminal. (AKA the command line.)
Go to the folder where the project is stored on your computer.
(Pro tip: in a new terminal window, type “cd” and then simply drag your folder into the terminal. Press enter.)
If you are having trouble opening your command line on your Mac computer, or getting to the folder location, please turn to the video I created.
Step 7: Git Init and Push to Github
These are the steps I followed once getting into the appropriate folder, where my website files are located.
git init— initializes git in your folder on your computergit add .— adds all the files in the folder, the period is importantgit commit -m "first commit"— committing to Github with a message of “first commit”git remote add origin https://github.com/laurencebradford/laurencebradford.github.io.git— this command is only done when adding a new repository to your folder. So this is only done this first time, not when making edits in the future.git push -u origin master— pushes changes to your Github repository, in the “master” branch.
As always, there are multiple ways to do one thing.
Nonetheless, after you push your changes, refresh your page, please. (The last we were on in step four.)
Step 8: Make Sure It Worked
After refreshing the page, something like this should appear.
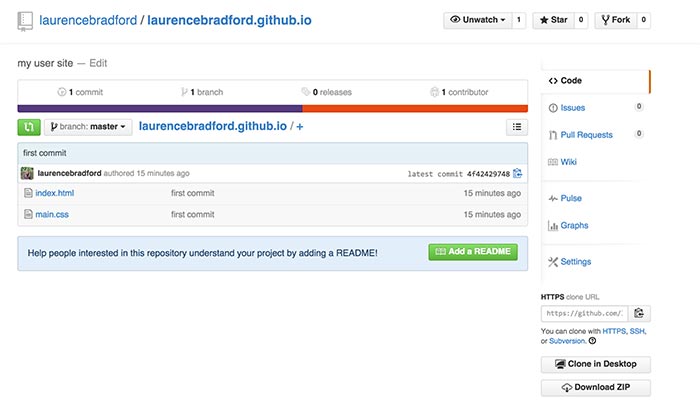
As you will see, the contents of your project folder will be there. For me, only index.html and main.css.
Now, head over to the URL username.github.io. (Where username = your Github username.)
This is what my site looks like. (Exactly how it looked locally on my computer.)
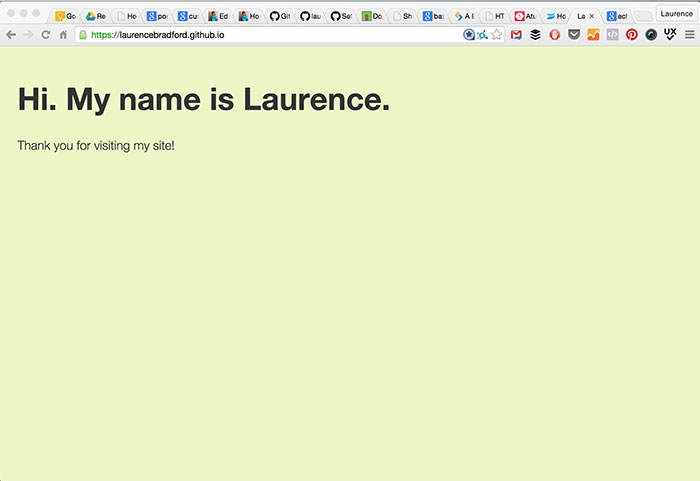
And, that’s it folks. You officially have a site online.
Questions You May Encounter When Using Github Pages
What can I use Github Pages for?
AKA—what kinds of sites.
With Github pages, you can only serve static assets (HTML, CSS, JS and images). You cannot set up a WordPress site, a RoR application, a Meteor.js app, and so forth.
But you can use Github’s Jekyll (static site/blog generator), which a lot of people use and love.
For more on Github Pages uses, etc.—look to the comment thread below.
What about making changes in the future to Github Pages?
With Github Pages, it’s easy to make changes to your site.
Simply,
- Edit the files locally on your computer, in your favorite text editor
git addthe files on your terminal, those you want to stage to be committedgit commityour changes with a message- And
git pushto your master branch
I made another video (separate from the first) that shows how to make changes to your website files and then bring them onto your live Github Page.
Click here to watch the video.
What about using a custom domain name with Github Pages?
You can attach a custom domain name (yourdomain.com) to your Github page. It is possible to do this for both project sites and user sites.
Here are directions from Github on how to set this up. Of course, you must buy a domain name first. (My favorite place to buy domain names is name.com.)
Can I only use Github Pages on a Mac?
This tutorial demonstrates setting up Github Pages on a Mac computer.
I wish I had a Windows computer I could access (with screencast equipment) so I could do another demo.
However, based on research that I did, I believe the above steps *should* work.
Anyways, here are some helpful resources if you are a Windows user:
1) Setting up Git on Windows (official Github documentation)
2) Github for Windows (official Github Client for Windows)
3) “How to Setup Github Pages – Website on Github – Complete Beginner Tutorial” (video on YouTube where a Windows computer is being used in the demonstration)
If my repository is public, can people edit my files?
There’s a lot that goes into this. And if you learn more about Github by taking a course or simply by experimenting, it’ll make more sense.
But, basically: no. A random person cannot edit your files so that they will appear differently in your repository, and hence on your username.github.io site.
But, when you make your files public on Github, anyone can view them. (Even without a Github Account.) And other Github users can “fork” your public repositories. Which is like a copy and paste.
People typically fork repositories if they want to either (a) build off your files for their own project or (b) to suggest changes.
I feel like I am guilty of “forking and forgetting”. Meaning I fork a repository, plan on building off of it or something…and then never do because I get distracted.
Anyways—the point is: DO NOT PUT ANYTHING UP ON GITHUB IN A PUBLIC REPOSITORY THAT YOU DO NOT WANT OTHERS TO SEE.
Sorry to yell. But the last thing I want is someone coming back to me because they put ____ in their repository and didn’t want anyone seeing.
Examples of this include but are not limited to:
- Sensitive information (addresses, passwords, credit card numbers)
- Images (that you do not want anyone seeing)
- Some idea you are working on (that you don’t want anyone to see)
- And so on…
What are my other options beyond Github Pages?
Don’t want to use Github Pages? Got it.
Here are a few other ways to get your site (namely HTML, CSS and JS files) online.
1. Amazon Web Services (AWS) S3
Here’s a tutorial: http://davidwalsh.name/hosting-website-amazon-s3. Here’s information from AWS, too.
2. Bit Balloon
Here’s a video explanation thanks to General Assembly on getting a site up on Bit Balloon.
3. Neocities
It was tough finding a video tutorial, but here is an article about the service.
Where can I learn more about Git, Github, and related?
Here are some online courses that cover topics mentioned above, so you can learn more.
- Git Basics course on Team Treehouse
- Console Foundations on Team Treehouse
- Github for Web Designers on LinkedIn Learning
- Introduction to Git and GitHub on Coursera
- GitHub: Getting Started on Pluralsight
- Complete Git Guide: Understand and Master Git and GitHub on Udemy
- Git & Github Masterclass on Udemy
Conclusion
There you have it: an easy eight-step process to getting your site live on Github Pages.
Whether you’re a more experienced web designer/developer or brand new, I encourage you to give Github Pages a try.
And then report back here, in the comments section below, with what you think.
Note: there are affiliate links in this post.