
If you’re a developer or designer, Sketch is a program you should know about. It’s a powerful tool allowing you to create beautiful designs for apps, websites, and more.
But if you want to handle the program as smoothly and efficiently as possible, there are a few tips and tricks that can help!
Disclosure: I’m a proud affiliate for some Sketch Packs. If you buy a product through my links on this page, I may get a small commission for referring you. Thanks!
In this guest post, Evan Leong of Sketch Packs shares five Sketch tips to help you be extra productive with your design workflow. At the end, he also features premade Sketch app resources and Sketch templates you can purchase for even more efficiency.
Here’s Evan!
Sketch is a lightweight, powerful design program that has captured the hearts of many product designers since its first release in 2010. What initially set Sketch apart from the competition was its intense focus for designing beautiful software mockups. At the time, other programs such as Adobe Photoshop were just too feature-packed with options catering to photo editing. Although it could be used to design software products, it wasn’t as optimized and streamlined as Sketch.
Today, Sketch is used by software product designers and developers around the world to create mobile and desktop app designs, website designs, interactive mockups, and much more.

Since Sketch’s rise, many other design and prototyping tools have emerged such as Figma, Adobe XD, InVisionApp, Framer, and numerous others. While these all offer amazing features too, Sketch is still a mainstay of the design workflow. They’ve done an incredible job at making it easy to get up and running, and there are a ton of small tips and tricks within Sketch to make it even better as you go along.
If you’re ready to supercharge your design workflow, here are a few quick Sketch tips to help you design faster and more efficiently!
1. The Power of Symbols And Overrides
For those that are new to symbols, they are basically a way to create multiple instances of one element. These multiple instances can then be edited and altered all at the same time by just making changes to the original symbol.

I’ll admit that in my first few months of using Sketch, I didn’t use symbols! I really didn’t feel like spending the extra time to create them, especially since I got so fast at creating shapes and buttons on the fly.
This came to a screeching halt when I needed to make branding changes across all my designs…which is much harder to do one by one. Now I rarely start a project without creating a few symbols first to get things started.
To make a symbol, take an element you’ve created and click the “Create Symbol” button on the top left.
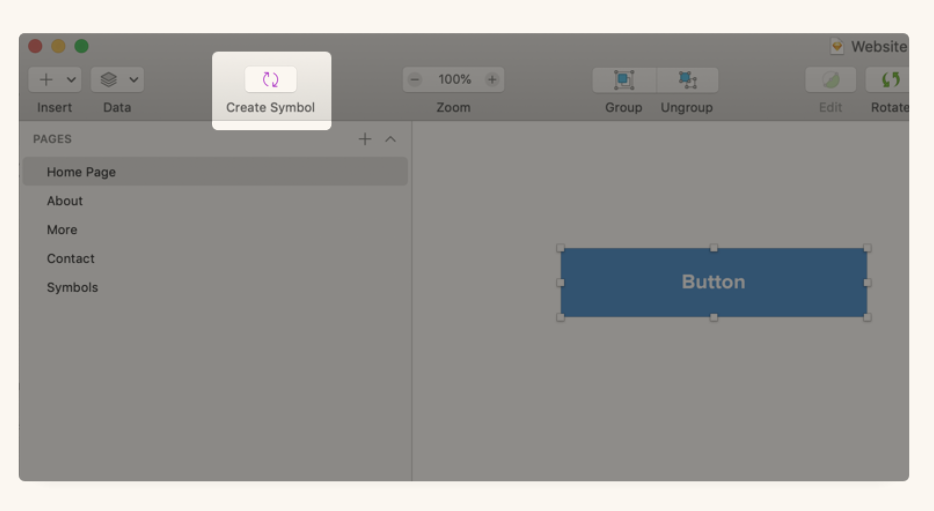
You’ll then be able to place this symbol anywhere in your project by going to Insert -> Document -> (Your symbol name).
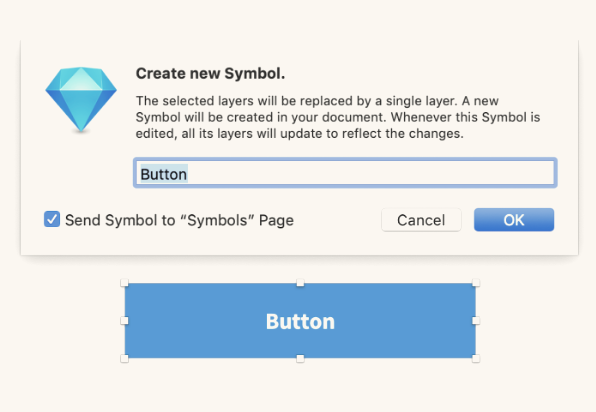
This will also create a new page titled “Symbols.” You’ll be able to make changes to your symbols here that will automatically update all other instances. For example, if we had a change in branded colors, we could simply jump into the Symbols page and change the button color. This will make all instances of that symbol change color throughout the entire Sketch project!
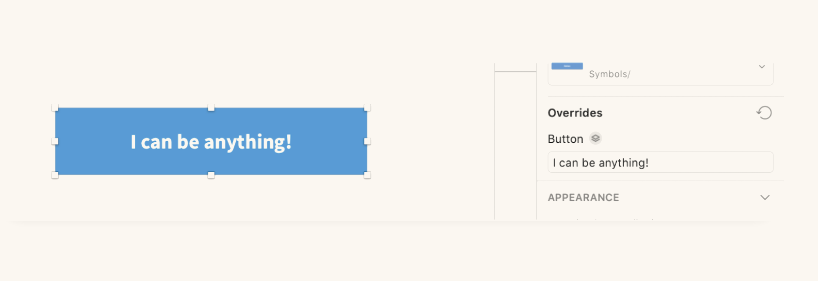
Another really nifty perk of using symbols is that all elements within the symbol will be editable per each instance. Continuing with our button example, we would be able to edit the button text in the Overrides panel on the right. This works for images, and even symbols of the same size!
Symbols are great for buttons, titles, headers, table views, and any other elements that are used in multiple areas throughout your project. It may seem time-consuming to set up initially, but trust me — it will go by fast and you’ll be glad you did it down the road!
2. Pinning Elements
Pinning will allow you to maintain the spacing of certain elements to each other. For example, if we pin a text element to the left edge of a form field, no matter how much we stretch the form, the text will stay the same distance away from the left edge. This comes in handy when dealing with multiple screen sizes, or resizing artboards in general.
To pin elements, simply select the element you’d like to pin, and click the anchors on in the resizing tab on the right. The anchor will turn blue when pinned, and will maintain its respective position to the element closest to it.
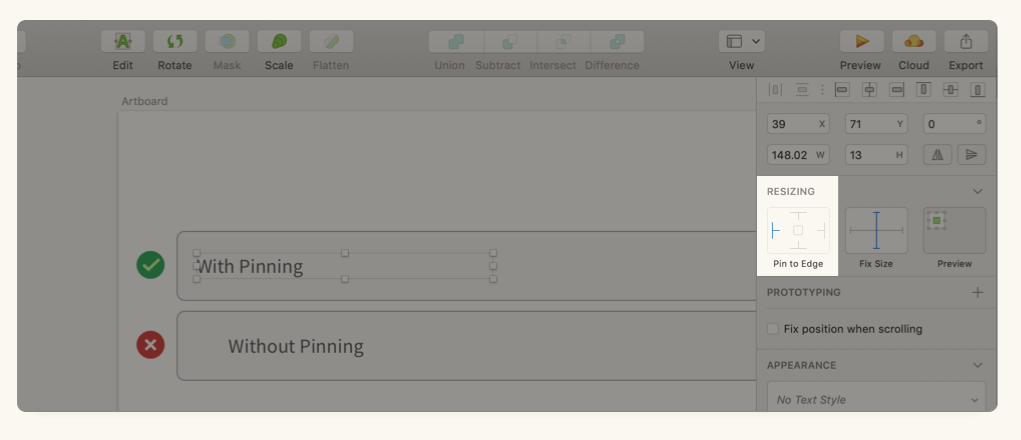
*Note that the elements need to be in the same group.
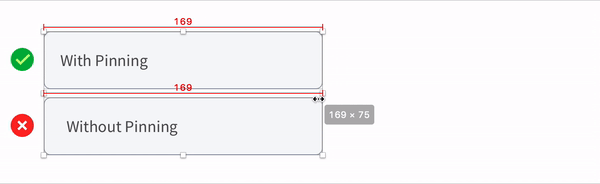
A quick tip when pinning icons and shapes: remember to click Fix Size in the right panel. This will maintain its size as the element is stretched. If you don’t fix the size, your shape or icon will become deformed!
3. Using Inner Shadows to Create Lines
This comes in handy when making lines in cells or forms. Oftentimes, creating a line that is 1 pt in thickness is too bold, and creating a line thinner than 1 pt causes alignment issues. This usually means you have to adjust the x or y position using decimals.
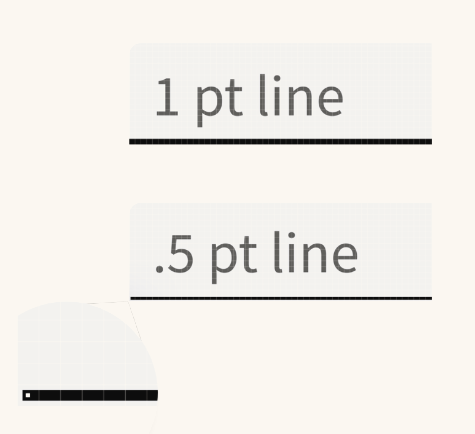
As you can see in the image above, creating a .5 pt line left space below it, meaning you’d need to manually adjust the position of the line. (Unfortunately, using the automatic alignment tool in the right panel doesn’t account for fractions of a point.)
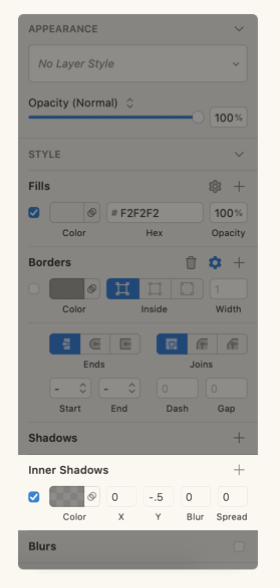
The solution? Use inner shadows instead! Create a rectangle as the container for your element. It doesn’t need to have a fill or border (although you certainly can add one). Make the y position the thickness you want your line, expressed as a negative number, and remove the blur.
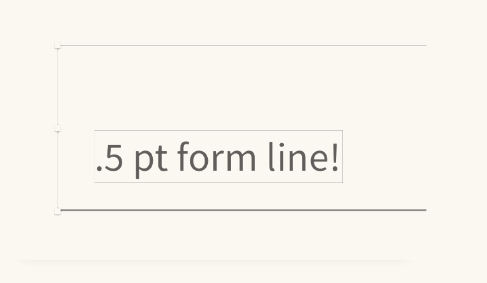
This will create a perfectly aligned line that is less than 1 pt. You can also use the container rectangle to help align the element to other items. Another great benefit to this is it’s all housed in one shape!
4. Using The Color Picker
The color picker allows you to quickly see the HEX of any element (even outside of Sketch!). While in Sketch, press ctrl + c. You will then be able to scan around the screen and identify colors.
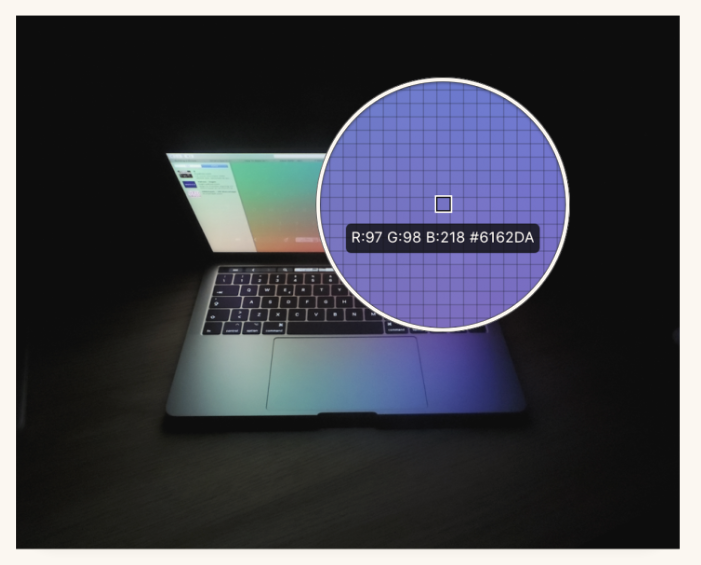
If you have an element with a fill (such as a shape) selected, you can click on any color while the color picker is activated and it will automatically fill the shape with the respective color. This comes in handy when you want to quickly test out a few colors from an image or color pallette. You can use the color picker to easily try out different colors until landing on the right one.
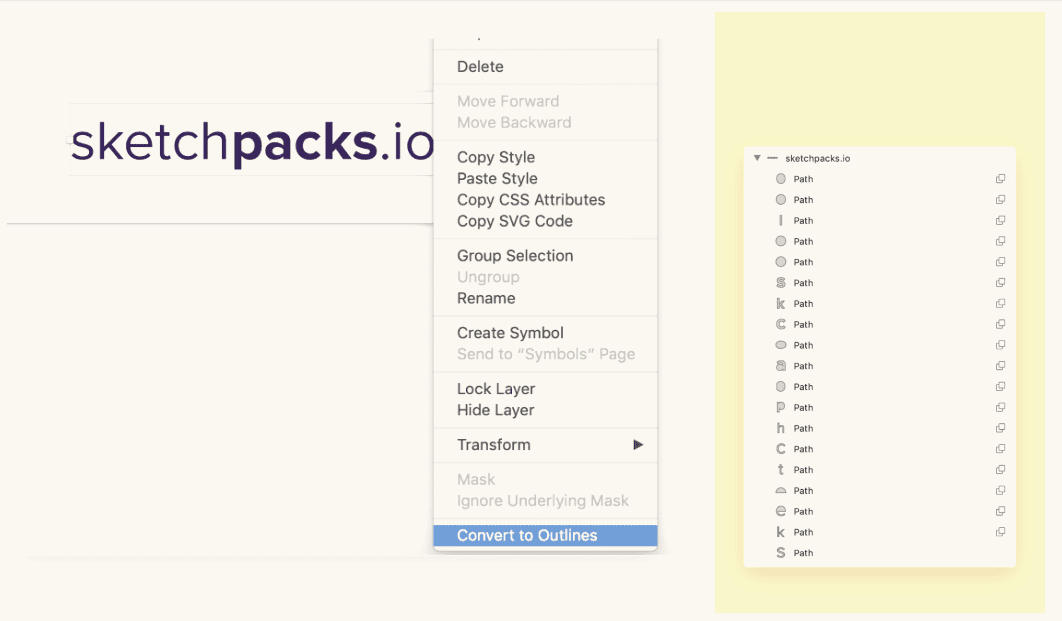
5. Converting to Outlines
Converting to outlines is great if you are creating branded assets that include text. Text items that need to be handed off to developers but aren’t in SVG format often cause issues, as the developer will likely need to wrestle with getting the text installed and applied. This also helps when creating media/press kits. Usually other designers want to work with SVGs and not have to install fonts to get your branding correct.

To convert texts to outlines, simply right click on any text in Sketch and select Convert to outlines. This will turn your text into exportable shapes that can be easily handed off!
About the author
 Evan has been involved with consumer-facing startups for the past decade, spearheading various apps in tech education, startup networking, and blockchain. He has a passion for building teams and experimenting with the unknown.